Fungi Photography
All text and images © David Noble.
Introduction
Photographing fungi is a type of nature photography but there are
some special factors -
- Subject is small.
- Subject does not move.
- The location is often fairly dark.
- The subject is low to the ground.
These factors lead to the following -
- You will need to use a macro lens or some other method of
getting close to the small subject.
- Because the subject does not move it is very useful to deploy
a tripod or other method of supporting the camera.
- Because there is not much light, the use of a tripod will
allow you to use a long exposure time. Alternatively you need to
provide an artificial light source.
- If a tripod is used then it must be one that allows the camera
to be placed close to the ground.

Equipment Considerations
Camera
Point and shoot cameras or those on mobile phone can be used to take
fungi photographs but they do have limitations. Control of focus is
hard and they do not work well in low light situations, but they do
have a large depth of field. You need to watch what the camera is
focussing on and probably take multiple exposures and then choose
the sharpest. Often point and shoot cameras have a dedicated macro
or close up setting. These small cameras do have a some advantages.
One is that a photo can be taken in a very short time, and you don't
hold up other people you are out and about with. Another is that
they are compact enough to fit into a pocket and so are often taken
with you.
To get a reasonable quality image a camera with a large sensor
should be used. This means using a Digital SLR or a mirrorless
camera with a large sensor. Because the subject is low to the
ground, it is a very great advantage if the DSLR offers live view on
a LCD screen. Mirrorless cameras all seem to offer this. As well,
because the camera is often very low to the ground, a screen that
has a degree of tilting is another major advantage. It is very
difficult to use a conventional viewfinder when the camera is low to
the ground. In the film days, before cameras had LCD screens, a
common accessory for macro work was a right angle viewer that was
added to the viewfinder.
The very best image quality will be obtained with a camera with a
full frame sensor. It will usually produce an image with less noise
in a low light environment and will allow for a greater amount of
cropping.
Lens
The use of a dedicated macro lens is the best option. They are
designed to work close to the subject - and usually go to a 1:1
magnification. This means if photographing an object 1 cm high at
the closest possible distance the lens will focus, then the image
will be 1 cm high on the sensor.
Macro lenses typically come in focal lengths of 60 mm, 90 or 100 mm
or as much as 180 mm. Each focal length has advantages and
disadvantages. A longer focal length such as 180 mm allows you to
take a photo a fair way from the subject, which may be important if
you are taking photos of insects so you don't disturb them so much.
This is not so important for fungi photographs. Indeed sometimes you
need to shoot in a confined space such as between boulders or trees
and you may not be able to get far enough away if using a longer
focal length lens. Also, you may think that a longer focal length
macro lens will have a smaller depth of field for a given camera to
subject distance. This is true, but is countered by having to
move the camera further away to frame the subject. The use of a
longer focal length also often gives a more pleasing perspective.
Probably the most used focal lengths are those around 100 mm.
Alternatives -
- Use the lens that comes with the camera. Often these lenses
allow you to get fairly close to the subject and get reasonable
results. Very few of these lenses, even if they have a macro
setting will allow for a 1:1 magnification however. Some wide
range zoom lenses can focus quite close when in the telephoto
position - and then can be used for macro work.
- Screw on close up lens - this is a lens that can be
screwed onto the front of a non-macro lens to allow you to get
closer to the subject. They come in two types -
- Simple lens - cheap, light weight and compact. These are
also known as "close up filters".
- Achromatic lenses - made up of more than one element, which
improves optical quality. More expensive, bulkier and heavier.
These lenses are available in a range of units called
dioptres (the reciprocal of the focal length). A typical one may
be a +3 dioptre. For photographing fungi, you may not need good
edge sharpness right to the edge of the frame or need to worry too
much about aberrations such as chromatic aberration that effect
the edge more than the centre of the image. So the use of these
lenses, even the simple cheap ones may be a good place to start. I
often throw a simple close up lens in my bag on a trip where I
don't expect to see fungi, so I can take close ups if I run into
something interesting.
- Extension Tubes - can be placed between a normal lens
and the camera body too allow you to get closer to the subject.
They can be a bit fiddly to use - eg working out which one in a
set of three, or which combination of them, to use to get the
desired subject in focus. They also reduce the light falling on
the sensor so this will mean an increased exposure time. Also -
if you place too many on your lens, then you may get vignetting
- the edges of your image may be dark.
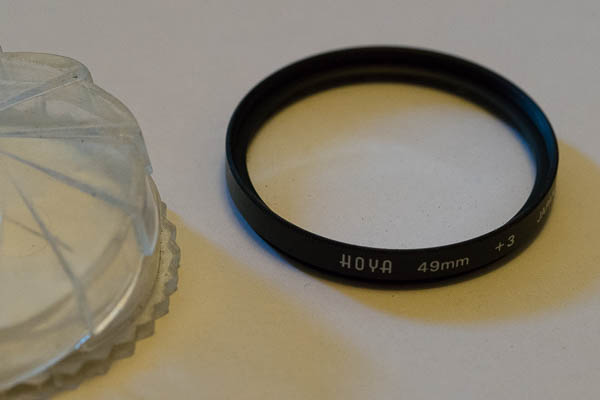
Simple close up lens
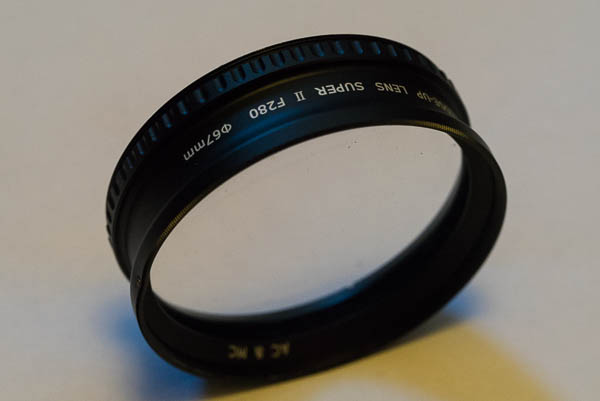
Achromatic close up lens
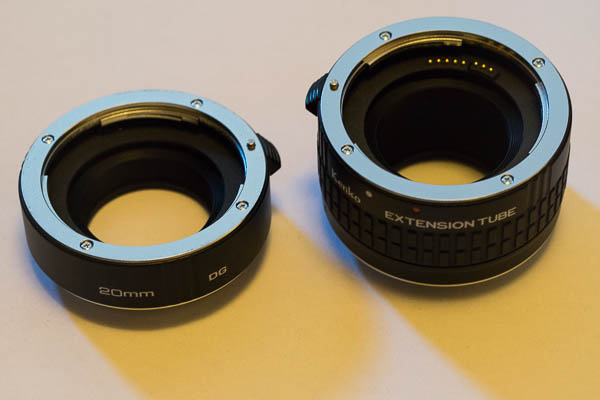
Extension tubes
Tripod
Unless a flash is used then a tripod should be used. It is necessary
that the tripod can be adjusted so that the camera can get very low
to the ground. There are two ways of doing this -
- The legs can be moved to an extreme angle - to nearly
horizontal. Not all tripods allow this, Many do not.
- The tripod head, or centre column can be taken out and
reversed - put back in upside down, and then the camera attached
upside down. Some cameras then will automatically flip the image
on the LCD screen so that it appears the usual way up. Not
all tripods will allow the head to be reversed. Sometimes
they can with a slight modification. On one of my tripods, the
centre column has a hook at the bottom to attach a weight to
help stabilise the tripod. If this hook is unscrewed, then the
central column can be taken out and put back in upside down.
This methods allows the tripod to take up less space than if the
legs are spread right out.
Some tripods will allow the legs to be swivelled more than 90° - so
that the camera can be attached in an upside down position without
taking out the centre column.

Here the tripod centre column is reversed. The camera with macro
lens is attached upside down. The LCD screen of the camera is
tilted slightly to make focussing and composition easier. The camera
body has an orientation sensor, so the image appears on the LCD
screen the right way up, and will be recorded by the camera the
right way up. (Photo taken by Chantal Chong, used with permission)
In some cases - the tripod can be used in the normal way - where the
fungi is high up on a bank or on a rotten log.
Important - For putting the camera on and off the tripod
quickly it is very desirable that the camera has an L plate and the
tripod has a good ball head with a clamp that will lock to the L
plate of the camera. A ball head will allow the camera to be
positioned towards the subject quickly and is very convenient. But
good ball heads are expensive - and they need to be good to be
useful and long lasting. Cheap ones fail to lock properly. The same
with a tripod. A good tripod is expensive. Light weight carbon fibre
tripods are now available but good ones are expensive. There
are also small quick release plates available that are much cheaper
than L plates.
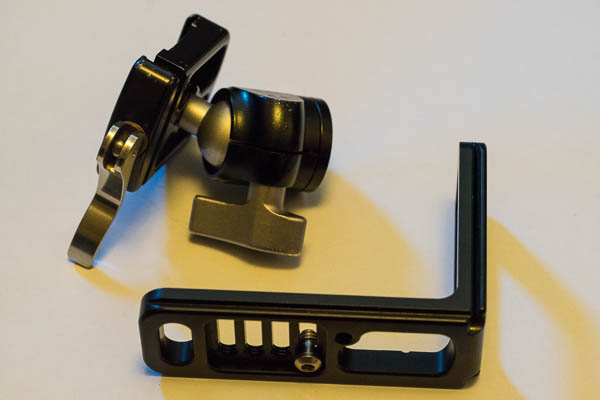
Ball head with quick release clamp and L plate. The L plate is
attached to the tripod socket of the camera.
Alternatives -
Use a small bean bag or similar object on which to place the camera
low to the ground. You need to make sure or hope that the camera
does not move during the exposure. Taking multiple photos may be a
good idea.
Table top tripod - a small tripod that does not go up too high.
These may be OK but may not be able to support the weight of a heavy
camera body and macro lens.
Gorilla Pod or similar - like a table top tripod, same
considerations. These can be good if using a small point and shoot
camera.
Hand hold your camera - this will often mean you will need to use a
high ISO and/or a large aperture such as f 4 which will limit the
depth of field. This may be OK in good light.
Accessories -
Spare batteries - long exposure photos chew up power, so take a
spare camera battery or two.
Bubble wrap - good for putting under your knees when you are
squatting down trying to focus and compose your photo, often on damp
ground.
Spare memory card - it is easy to forget to put one back in the
camera after downloading photos to your computer if you use a card
reader.
Settings
Aperture - f 16 or f 22 is suggested for general use. See the
section on depth of field below.
Exposure - I use the aperture priority setting on my camera,
so the camera determines the exposure time. This can range from 1/5
second or shorter to 30 seconds. This is why I use a tripod. It is
important to look at highlights - either using the histogram, and
checking the right side (highlights) or turning on the "zebra
stripes" or show highlights feature on your LCD screen if available.
Often it is desirable to use exposure compensation - setting it to
-1/3 or -2/3 of a stop (or more). For example if taking a photo of a
white mushroom against a dark background. Normal exposure will
expose largely for the background and render it grey and you will
loose all detail in the mushroom. Also - if you camera has a setting
for this then it can be worth turning it on - long exposure noise
reduction. Noise from the camera sensor can be a problem in long
exposures - and long exposure noise reduction if enabled, then takes
another exposure from the sensor without any light hitting it and
subtracts that exposure from the one you have taken to cancel any
noise. The disadvantage of this is that it takes time. If you take a
20 second exposure then the camera takes another 20 seconds
"processing the image" (really taking the second exposure) before
you can take another photo.
ISO - depends on the available light. I tend to use 100 ISO
if sufficient light (for less noise, best quality), but there is
often not enough light, so I increase the ISO to 400 or 800. Modern
sensors can produce very good images with low noise at these
sensitivities.
Focus - manual. This is essential for macro work. Turn off
auto focussing. An LCD with magnified view is very handy for getting
precise focussing of the subject. This is where an LCD that can
swivel is useful. When choosing a point to focus on keep in mind
there will be about twice the distance in acceptable sharpness
behind that point than in front of it. However, while this principle
is very useful in landscape photography, it often doesn’t help much
in macro shots where the depth of field is only a few mm or less. If
possible, compose shot so multiple subjects are the same distance
from the lens if you want them all sharp.
Multiple exposures - often take the photo a few times in case
the tripod shakes or shifts a bit. In damp ground, the tripod legs
can sink slightly during the exposure.
Stabilisation - Turn off if using a tripod.
Mirror up or live view - If using a DSLR, then the camera may
have an option to put the mirror up before taking the photo. This
reduces vibration. But if you use live view on a DSLR then the
mirror is already up and live view also provides the most accurate
manual focussing.
Remote Control or delayed action (self timer) - to
reduce the vibration that takes place when you press the shutter
button. I typically use a 2 second delay.
Use RAW - this will give you a lot more possibilities for
post processing. Importantly it gives you a lot more range to reduce
over exposed highlights and to open up shadow areas. And shoot at
the highest resolution your camera will allow.
White Balance - can be set to auto, or you can use shady etc
or set manually. Not so important if you shoot in RAW as it can be
adjusted in post processing. Accurate white balance is important for
scientific documentation if you want to record accurate colours. To
set an accurate white balance - then an easy to do this is to
include a white sheet of paper in the image of one of your photos -
and this can be used to set the white balance during post
processing. Note that in a dark rainforest, our eyes may find it
hard to perceive the actual colour. This is due to the way our eyes
work - they are more sensitive to detail rather than colour in low
light.
Some cameras have the ability to store a set of camera settings -
and then this makes the camera very easy to switch in "fungi mode"
Lighting and Exposure
Natural light - is often fine for fungi macro photography.
Often the softer light of a cloudy day is better than a bright sunny
day. The worst situation is when the subject is partly in the sun
and partly in shade. In any sunny situation I always shade the
subject - with my body, backpack, or a hat or sheet of paper etc.
Just after rain can cause problems when everything is wet - too many
reflections. Reflections can be reduced by using a polarising filter
- and then view the fungi in the LCD screen as you rotate the filter
to a position that eliminates or minimises the glare. Note that
polarising filters reduce the light hitting the camera's sensor -
and this will be in a situation of very low light to start off with.
Reflectors and diffusers - many serious photographers use
these. I often just use a sheet of white paper or cardboard as a
simple reflector. This can be positioned to add a lot more light to
light up dark parts of the subject - eg under a cap.
Flash - a small flash on a camera is not suitable for macro
work. A single flash will often produce a dull washed out image.
Some people use a ring flash that is designed to work with a macro
lens (or a special macro flash - with two or more flash heads).
Others use multiple flash guns controlled by a master flash or
radio. A macro lens with a ring flash can negate the use of a
tripod.
Other artificial light sources - small LED arrays can be used
to provide soft artificial lighting
Depth of Field
For most fungi photography a large depth of field is desirable for
the whole subject to be in focus. This is especially so if you are
photographing a cluster of fungi. The problem when photographing
tiny subjects like fungi is that the depth of field is very small
compared to say landscape photography. For example a 28 mm wide
angle lens set at f 8 will have a depth of field from about 2.5 m to
infinity. On the other hand a 100 mm macro lens focused on something
close may only have a depth of field of a few mm at f 8.
Depth of field can be increased by -
- Using a high f number (small aperture setting) - eg f 16 or f
22, See this page. But you need
to be aware of diffraction effects.
- Taking the photograph from further back and then cropping (eg
if you move closer to the subject, so that the subject is
doubled in size, then the depth of field is decreased to 25 % of
what it was before)
- Focus Stacking - producing a composite image from the most in
focus sections of a number of photos taken with different focus
points. See this page.
For some photos it may be desirable to use a narrow depth of field,
for example, if you want the subject isolated from a cluttered
background. In some situations it can be worth taking multiple
photos at a range of apertures and then choosing the best one. If
you have the time and patience - it can be worth combining a narrow
depth of field (so the background is blurred) with focus stacking -
so all the subject is sharp.
Composition
Some considerations -
Tidy Up the Fungi - you may need to remove sticks or leaves
near the fungi. Fungi are often evry delicate and great care is
required for this.
Odd numbers of fungi in a photo - 1, 3, 5 etc not 2 (but
exceptions). This is a general rule of composition, but like all
such rules it can be ignored in certain situations.
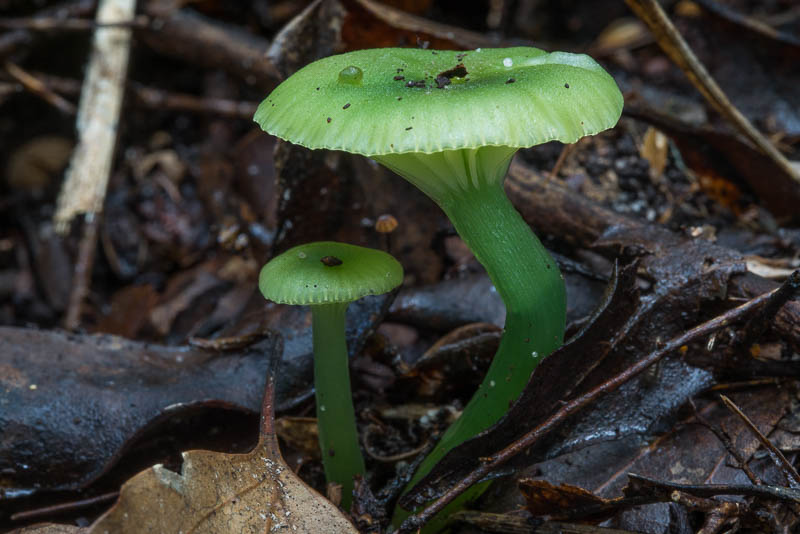
This picture conflicts with the odd number of subjects rule - but
the subjects are quite different is size and their shape. The same
colour unites them.
Rule of Thirds - the usual rule of composition applies -
place important subjects not in the centre - but near points 1/3 of
the way from the edges. This can often be achieved by cropping in
post processing.
Clusters - a cluster can look more interesting than a small
number of fungi
Colour - bright colours that stand out can be good. Some good
photos can be obtained by using contrasting colours - eg a bright
red fungus against a green mossy background.
Subject isolation - Make the subject stand out. This can be
achieved by -
- Cropping - when taking the photo make sure the subject fills
most of the frame, or tightly crop in post processing.
- Colour isolation - eg a bright red fungus against a green
mossy background. Sometimes this can be achieved by carefully
moving leaves or other objects. Eg moving leaves away from the
subject or moving them behind the subject if they are a
different colour to the subject.
- Focus isolation - Using a narrow depth of field can isolate a
fungus from the background. In some situations this is the only
way to isolate the subject - eg a black club against a dark
background.
Angle - Some fungi looks good taken from slightly above and
at a low angle, some when taken from below. It is worth
experimenting with different angles if you can. Move around the
fungi.

The subject is well isolated from its background. Exposure
compensation was used. It was also focus stacked. The cluster was
growing high on a log - so a low angle could be used.
Here the subject is isolated using a narrow depth of field ( f
6.3). The camera is set close to the ground at the same level as the
subject.
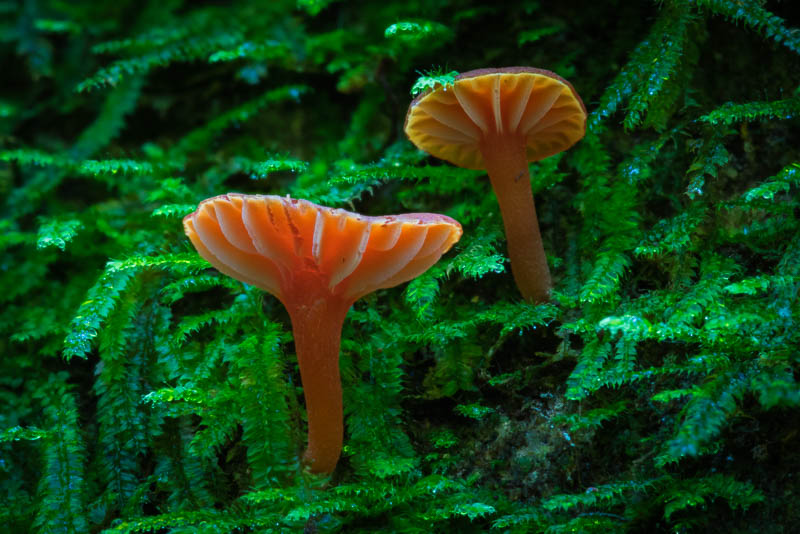
These fungi are isolated by a background of quite different colour
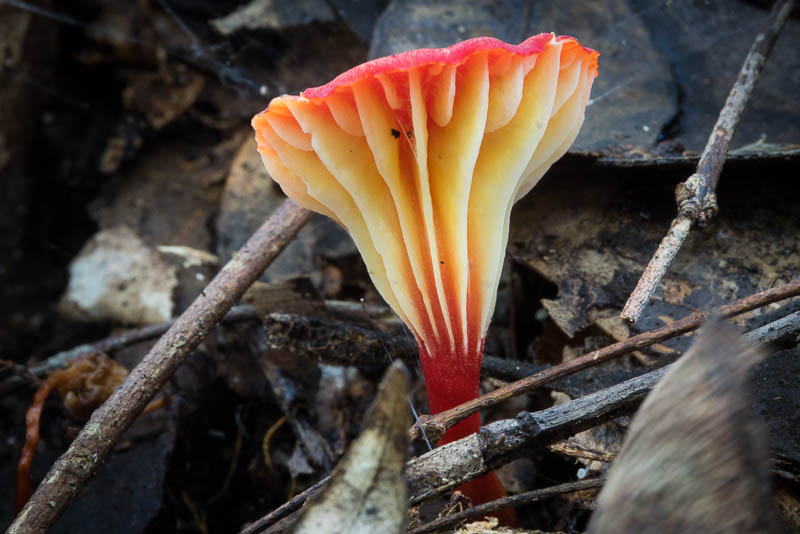
to the subjects. A low angle clearly shows the gills.

This club is isolated by using an aperture of f 11 - a
compromise between getting most of the club in focus and the
background out of focus.
Lighting - sometimes the picture can be a lot more interesting
if parts of the fungus such as the gills are lit up. A simple
reflector such as a sheet of white paper can be used here.
Post Processing
This is what you do on your computer once the image is downloaded.
You have a lot more options here if you shoot in the RAW mode if
your camera supports this. For my photos I currently use Adobe
Lightroom for this. For fungi macro photos I typically make the
following adjustments (in order) -
- Slightly increase contrast, clarity and vibrance (eg each by
15 units) - this often needed for RAW images.
- Crop the subject - I find this is needed in many images.
Sometimes slight cropping, sometimes major cropping. It is at
this stage that I often crop a landscape image to a portrait
format. It is particularly useful to crop out distracting parts
of the image - such as bright objects to the side of he subject.
- Use the sliders to open up the shadows or reduced the
highlights. Then sometimes the contrast or clarity (micro
contrast) needs to be turned up more to make the image more
punchy again.
- Often I add a slight edge vignetting - to make the subject
stand out a bit more.
If focus stacking a set of images, then I export them as full size
tiff files, with exactly the same adjustments, but no cropping, and
then import the final tiff file produced by the focus stacking
software, and then post process the image as above.
Subjects
General Advice -
- Choose fresh fungi with no bits missing
- Viscid (slimy) fungi look good
- Colourful fungi are good - waxcaps, coral fungi
- Interesting forms - gills, stinkhorns. toothed fungi, jelly,
clubs
- Fungi being eaten - by slugs, snails, springtails
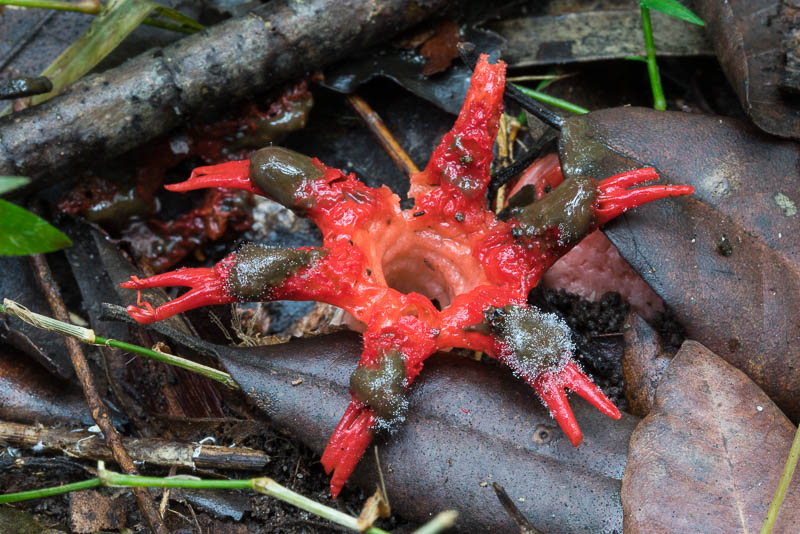
Stinkhorns - always interesting subjects

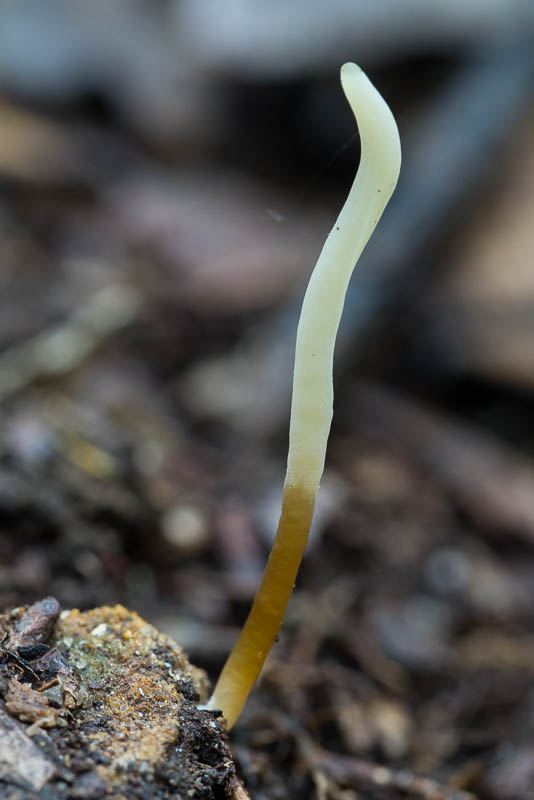
Unusual colours are striking
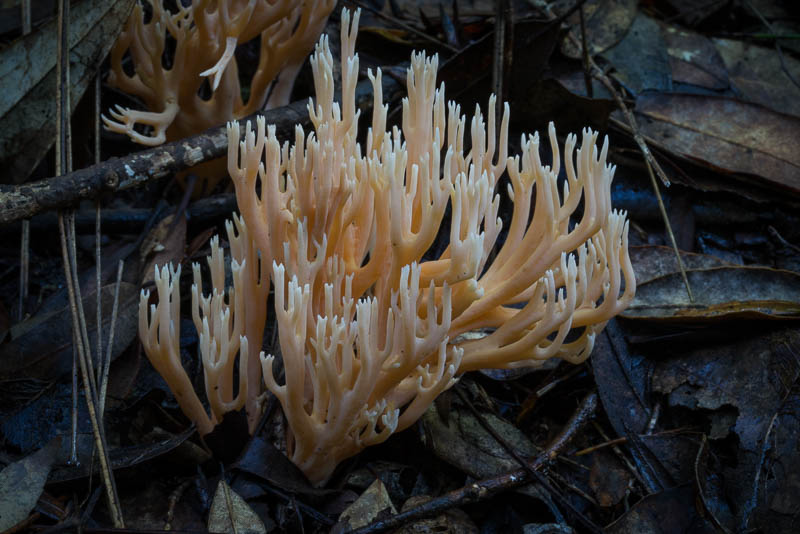
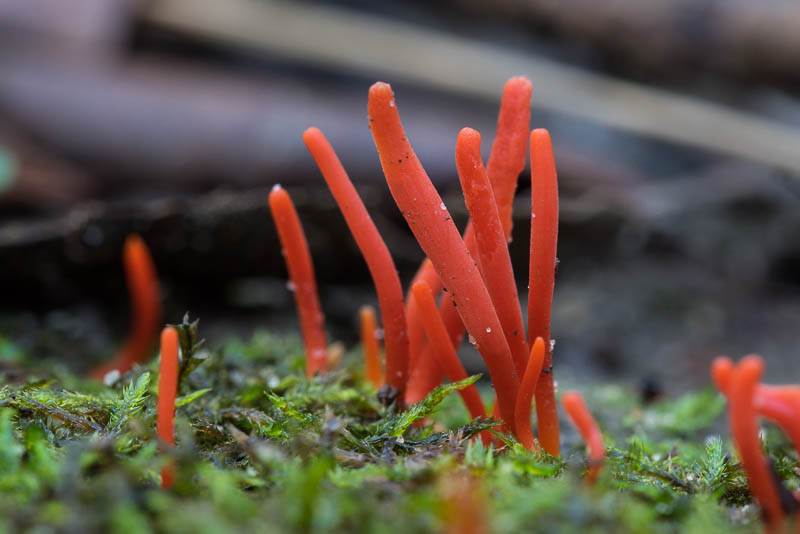
Coral fungi often provide interesting subjects
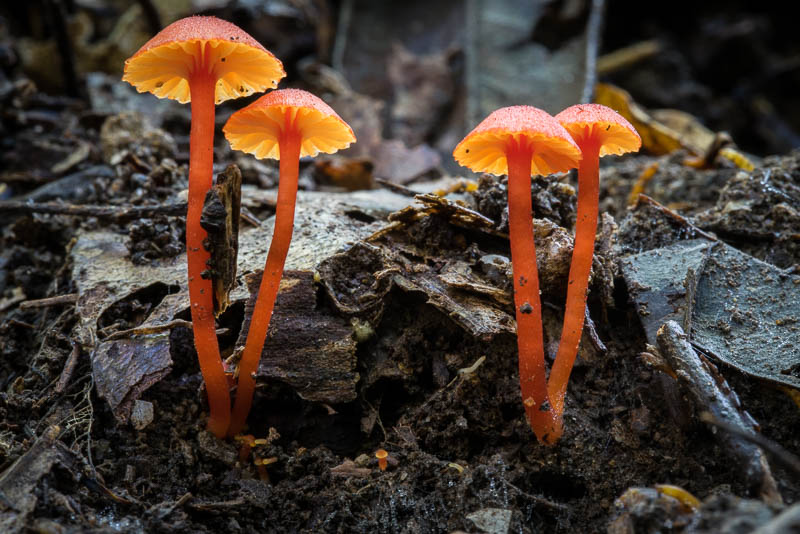
A low angle is used here to show the bright gill colour
Finding Fungi
- This is something you get better at with practice. Once you
know what to look for and typical places you find them, then
finding more becomes a lot easier.
- Fungi often prefers moist places - such as near moss or in
leaf litter. Many do not grow under ferns. Rainforests are good
places.
- The fungi season starts (in Sydney) in about February and is
best during Autumn and early winter.
- There is a distinct cycle of fruiting. Some fungi appear
early - eg many boletes, while waxcaps appear only after cold
weather and can be found even in early August.
- Rain - after rain is a good time to look for fungi. About 4
days after rain has started falling is good. Too much rain - eg
a downpour can damage fungi. So can hot weather and winds.
- Fungi are often found in large clusters or hotspots. So if
you find some fungi, then look for more in the same general
area. Sometimes these hotspots are only good for a short period
of time - a week or so during the fungi season.
- When photographing a fungi, you are low to the ground, and
while waiting for my camera to finish taking the photo (eg
during a 20 second exposure), I tend to look around, and this is
where being low is a real advantage. From a low position you do
tend to spot a lot of fungi that you would otherwise miss.
Especially the small back clubs or green mushrooms that are hard
to spot in moss.
Identifying Fungi
Once you have taken your fungi photographs, then how do you identify
what species it is? Telling fungi apart can be very difficult and
often requires the use of a microscope to look at the spores or at
small structures. Various books are a good way to start. These
things will help with fungi identification -
- What the fungi is growing on - eg wood or soil, or in leaf
litter (this is called the substrate)
- Does the fungi have gills? Some, like boletes have pores, some
have spines or teeth.
- A photograph taken from a low angle that shows the gills is
useful for identification - eg the gill colour, and how the
gills are attached.
- Some fungi have a distinct smell
- Eating the fungi is a very bad way to try and identify the
fungi - it can lead to death or the need for a liver transplant
etc.
- The colour of the spores - sometimes you can see spores that
have fallen onto the stipe (fungi stem). Many people make a
spore print (by placing the fungi on a sheet of paper
overnight).
- Looking for a ring, or annulus that goes around the stipe,
lower down than the cap, or the remnants of a veil type
structure that was present when the fungi was forming.
As fungi age, they change colour and dry out - this can radically
change their appearance. It can be very difficult to identify old
weather beaten fungi. Also juvenile fungi can look quite different
to mature fungi. Some fungi changes quickly -and the fruiting body
only lasts a day or so. One genus - auto-digests itself - the cap
and stipe turn into an inky mess while the fungi is not very old.
Some other fungi can be quite robust - and can last weeks or longer.
Often bracket fungi fit into this category, but surprisingly enough
so do toothed jelly fungi.
If you are trying to identify a fungi - then a photo that shows a
range of features, or more than one photo can be helpful - showing
the top of the cap, under the cap, the gills, and any annulus etc.
Acknowledgements - Thanks to David Forbes for pointing out some
corrections and making some very useful suggestions.
Return to david-noble.net